Linux Installation
The following steps will help you install pyGenClean on a Linux
machine.
Requirements
The following softwares and packages are required for pyGenClean:
- Python 2.7
- PLINK (1.07)
numpy(version 1.6.2 or latest)matplotlib(version 1.2.0 or latest)scipy(version 0.11.0 or latest)scikit-learn(version 0.12.1 or latest)Jinja2(version 2.7.3 or latest)
Note
All the requirements will be installed along with the main
pyGenClean module.
Warning
The Plink software needs to be in the PATH (or in the current working directory). In other words, you should be able to type plink at the command line.
Installation
There are two main ways to to install pyGenClean: using an existing
Python 2.7 distribution and creating a Python
Virtual environment, or using Miniconda.
Virtual environment
If python is already installed, a python virtual environment should be created. If one is already present, you can just proceed to the Activating the environment section.
To create a new python virtual environment, download the latest version of
virtualenv, located at this web page:
http://pypi.python.org/pypi/virtualenv. At the moment of writing this
documentation, the latest version was 13.1.2, and the file was named
virtualenv-13.1.2.tar.gz. Locate the archive, which is usually in the
~/Downloads directory.
$ cd ~/Downloads
$ tar -zxf virtualenv-13.1.2.tar.gz
$ cd virtualenv-13.1.2
There is no need to install the module. Just create a directory and create the Python virtual environment:
$ mkdir -p ~/softwares/Python-2.7_virtualenv
$ python ./virtualenv.py \
>     --no-site-packages \
>     ~/softwares/Python-2.7_virtualenv
Activating the environment
To activate the Python virtual environment, perform the following command:
$ source ~/softwares/Python-2.7_virtualenv/bin/activate
Finally, to deactivate the Python virtual environment, either close the terminal, or perform the following command:
$ deactivate
Warning
For the following installations and tests, be certain that the Python virtual environment is activated, or nothing will work as planned...
The best way to know if the Python virtual environment is activated, is to see its name, in parenthesis, before the usual prompt in the terminal. For example:
(Python-2.7_virtualenv)[username@localhost ~]$
Installing pyGenClean
To install pyGenClean, only perform the following command:
$ pip install pyGenClean
Updating pyGenClean
To update pyGenClean, perform the following command:
$ pip install -U pyGenClean
Miniconda
Download and install miniconda (located at
http://conda.pydata.org/miniconda.html). By default, miniconda is installed
in ~/miniconda.
To create a new virtual environment, perform the following command:
$ conda create -n Python-2.7_virtualenv python=2
Activating the conda environment
To activate the Python virtual environment (miniconda), perform the following command:
$ source ~/miniconda/bin/activate Python-2.7_virtualenv
Finally, to deactivate the Python virtual environment, either close the terminal, or perform the following command:
$ source deactivate
Warning
For the following installations and tests, be certain that the Python virtual environment is activated, or nothing will work as planned...
The best way to know if the Python virtual environment is activated, is to see its name, in parenthesis, before the usual prompt in the terminal. For example:
(Python-2.7_virtualenv)[username@localhost ~]$
Installing pyGenClean
To install pyGenClean, only perform the following command:
$ conda install pyGenClean -c http://statgen.org/wp-content/uploads/Softwares/pyGenClean
Updating pyGenClean
To update pyGenClean, perform the following command:
$ conda update pyGenClean -c http://statgen.org/wp-content/uploads/Softwares/pyGenClean
Testing the installation
Warning
Before using pyGenClean, be certain that the previously installed Python virtual environment is activated (see Activating the environment or Activating the conda environment for more information). If the proper environment is not activated, noting will work...
To test the algorithm, download the test data from http://statgen.org/downloads/pygenclean/ and the HapMap reference populations (build 37).
Locate the downloaded archives (it should be in the ~/Downloads directory).
Perform the following commands:
$ cd ~/Downloads
$ mkdir -p ~/test_pyGenClean
$ tar -C ~/test_pyGenClean -jxf check_ethnicity_HapMap_reference_populations_b37.tar.bz2
$ tar -C ~/test_pyGenClean -jxf pyGenClean_test_data.tar.bz2
$ cd ~/test_pyGenClean
Create a text file named conf.ini inside the ~/test_pyGenClean
directory, containing the following text:
1 2 3 4 5 6 7 8 9 10 | [1]
script = check_ethnicity
ceu-bfile = check_ethnicity_HapMap_ref_pops_b37/hapmap_CEU_r23a_filtered_b37
yri-bfile = check_ethnicity_HapMap_ref_pops_b37/hapmap_YRI_r23a_filtered_b37
jpt-chb-bfile = check_ethnicity_HapMap_ref_pops_b37/hapmap_JPT_CHB_r23a_filtered_b37
nb-components = 2
multiplier = 1
[2]
script = sex_check
|
Run the following command:
$ run_pyGenClean \
>     --conf conf.ini \
>     --bfile pyGenClean_test_data/1000G_EUR-MXL_Human610-Quad-v1_H
Results
Valuable information will be shown in the terminal. Once the program has
finished, the results are in the new directory data_clean_up.date_time
where date is the current date, and time is the time at which the
analysis started.
Here are the new directory structure, with only the files you might be interested in:
data_clean_up.date_time/pyGenClean.logautomatic_report.texexcluded_markers.txtexcluded_samples.txt1_check_ethnicity/ethnicity.before.pngethnicity.outliers.pngethnicity.outliersethnicity.population_file_outliers
2_sex_check/sexcheck.list_problem_sex
The file pyGenClean.log contain the information that was displayed in the
console. The file automatic_report.txt contain the automatic report
generated by pyGenClean. The files excluded_markers.txt and
excluded_samples.txt contains the list of markers and samples,
respectively, that were excluded from the dataset (with the reason).
1_check_ethnicity/
The first image in the first directory
(ethnicity.before.png) shows the MDS values for each
sample before outlier detection. The second image
(ethnicity.outliers.png) shows the outliers that should be
removed for further analysis. Finally, the file ethnicity.outliers include
a list of samples that should be removed for further analysis. The total
number of outliers for this test should be exactly 63, but the figures might
be mirrored for 32 bits systems. For more information about the results of this
module, refer to Section Ethnicity Module.
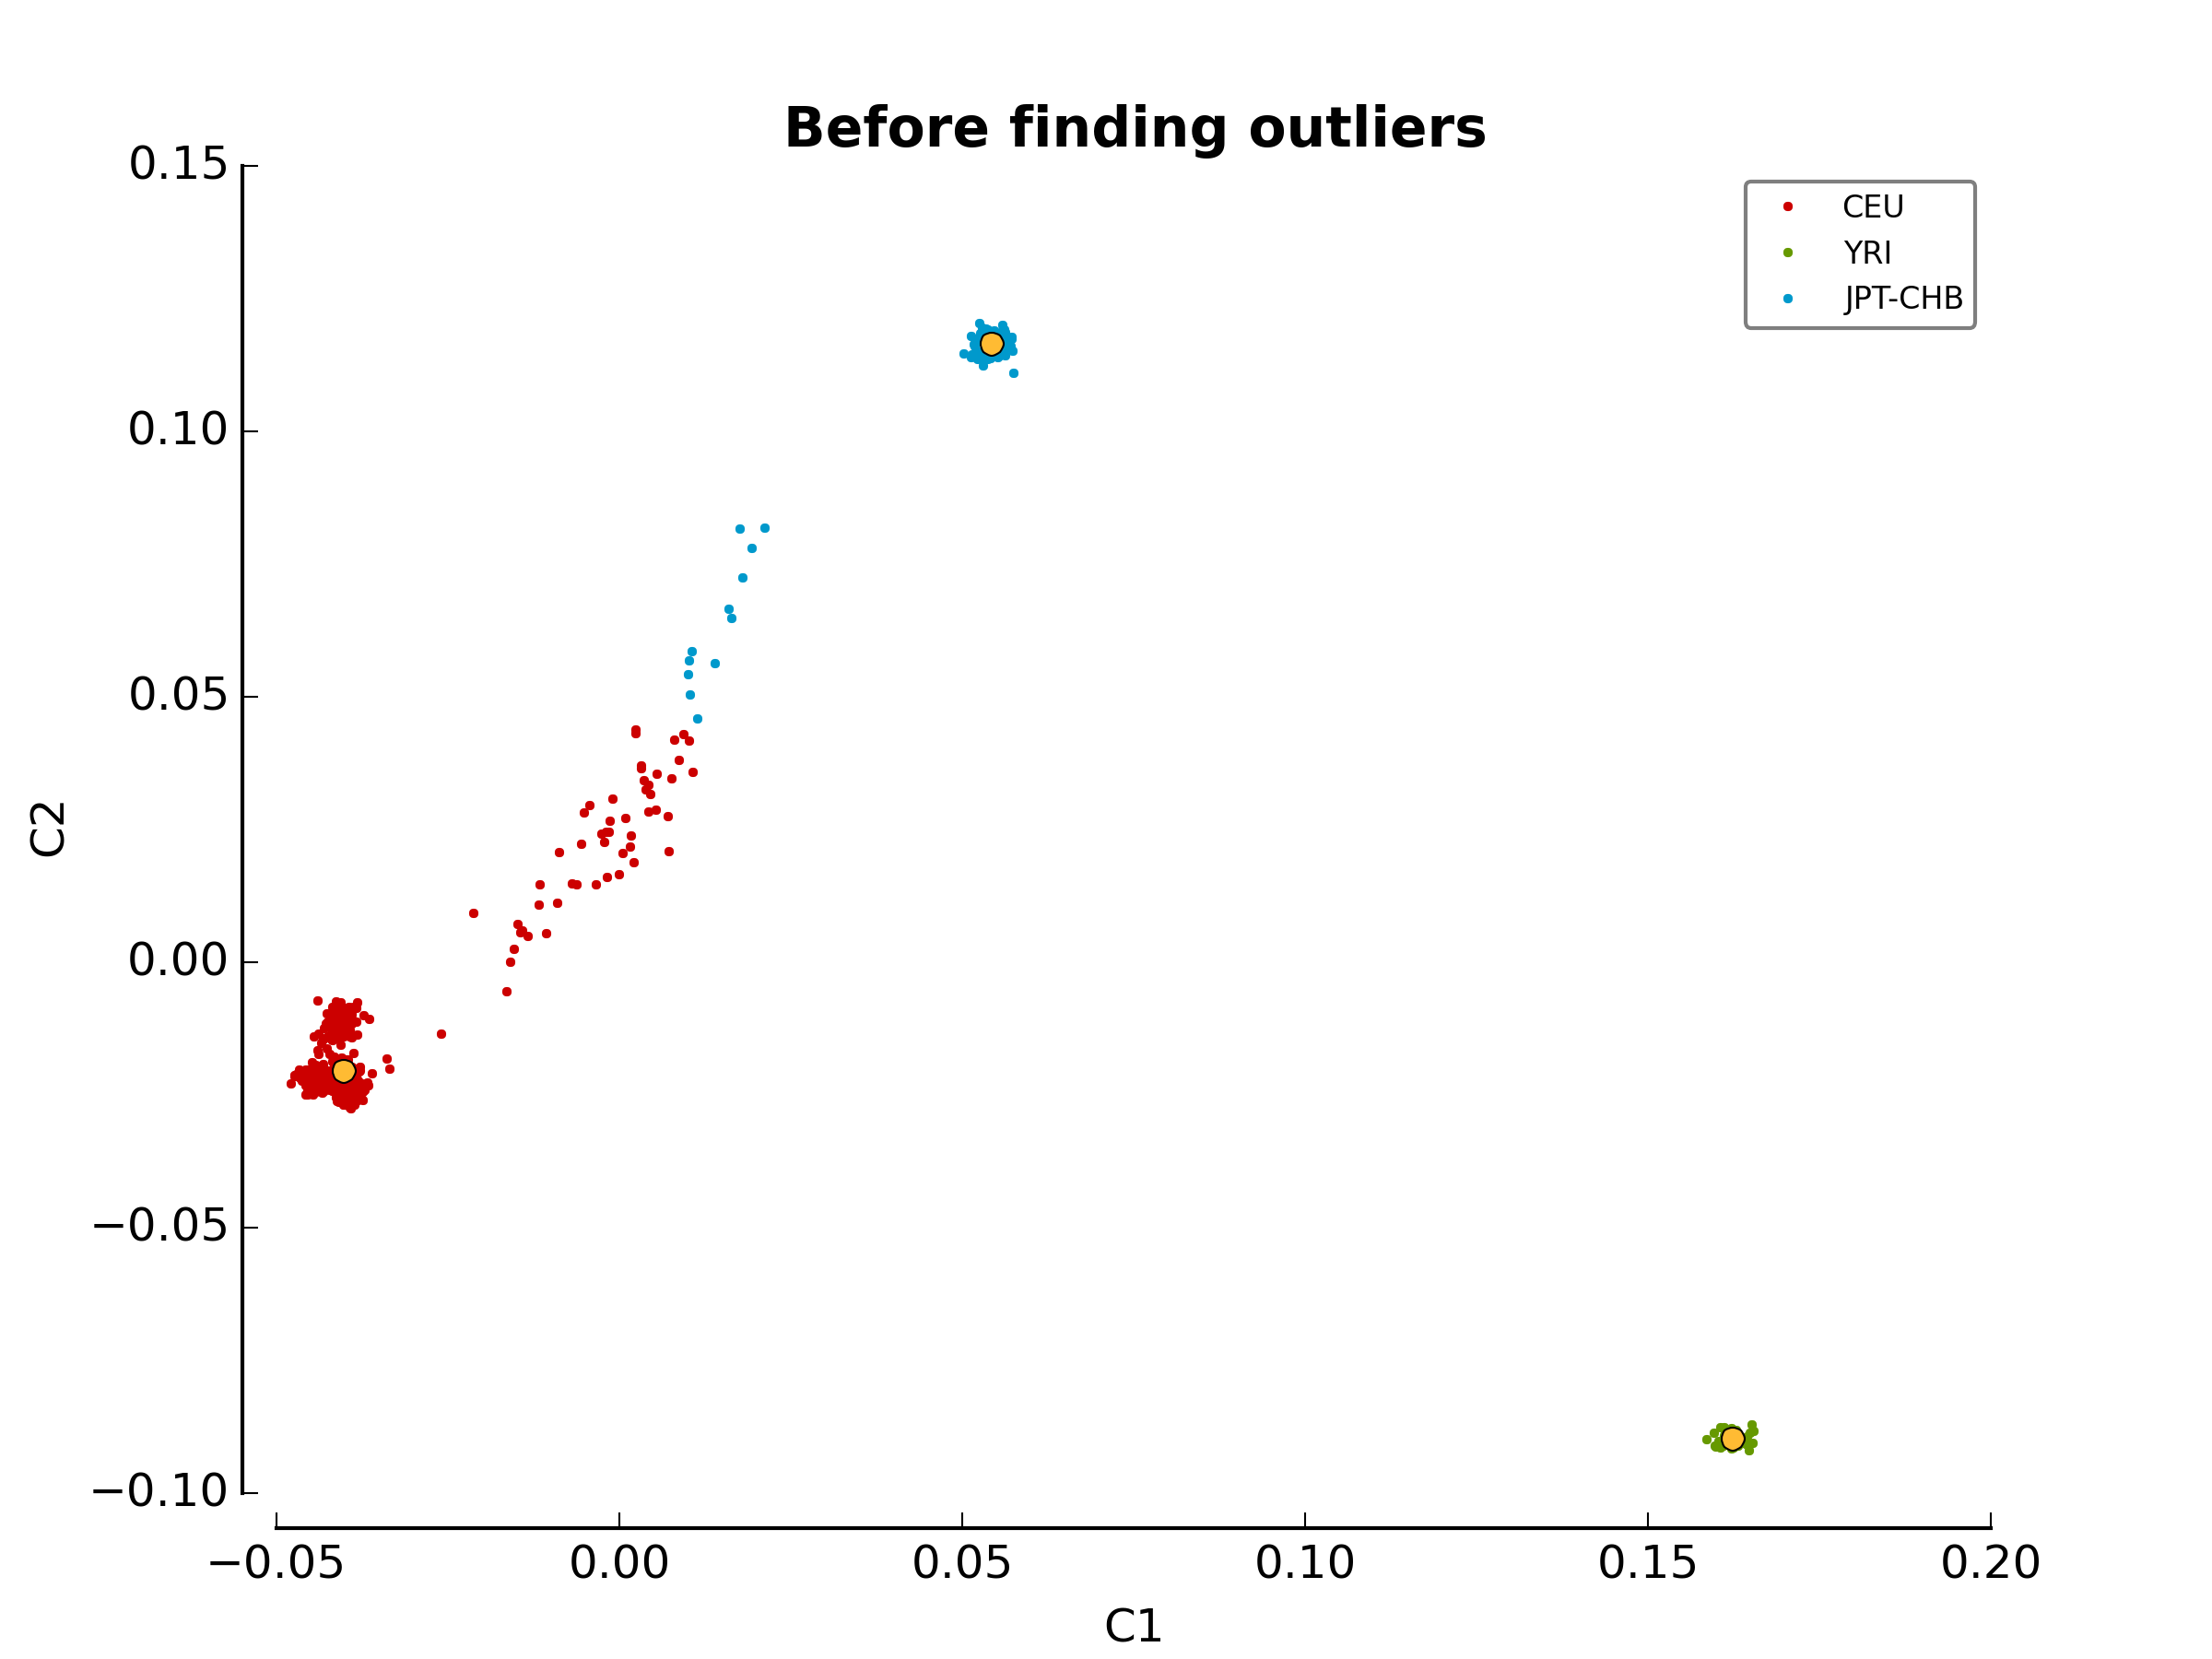
ethnicity.before.png
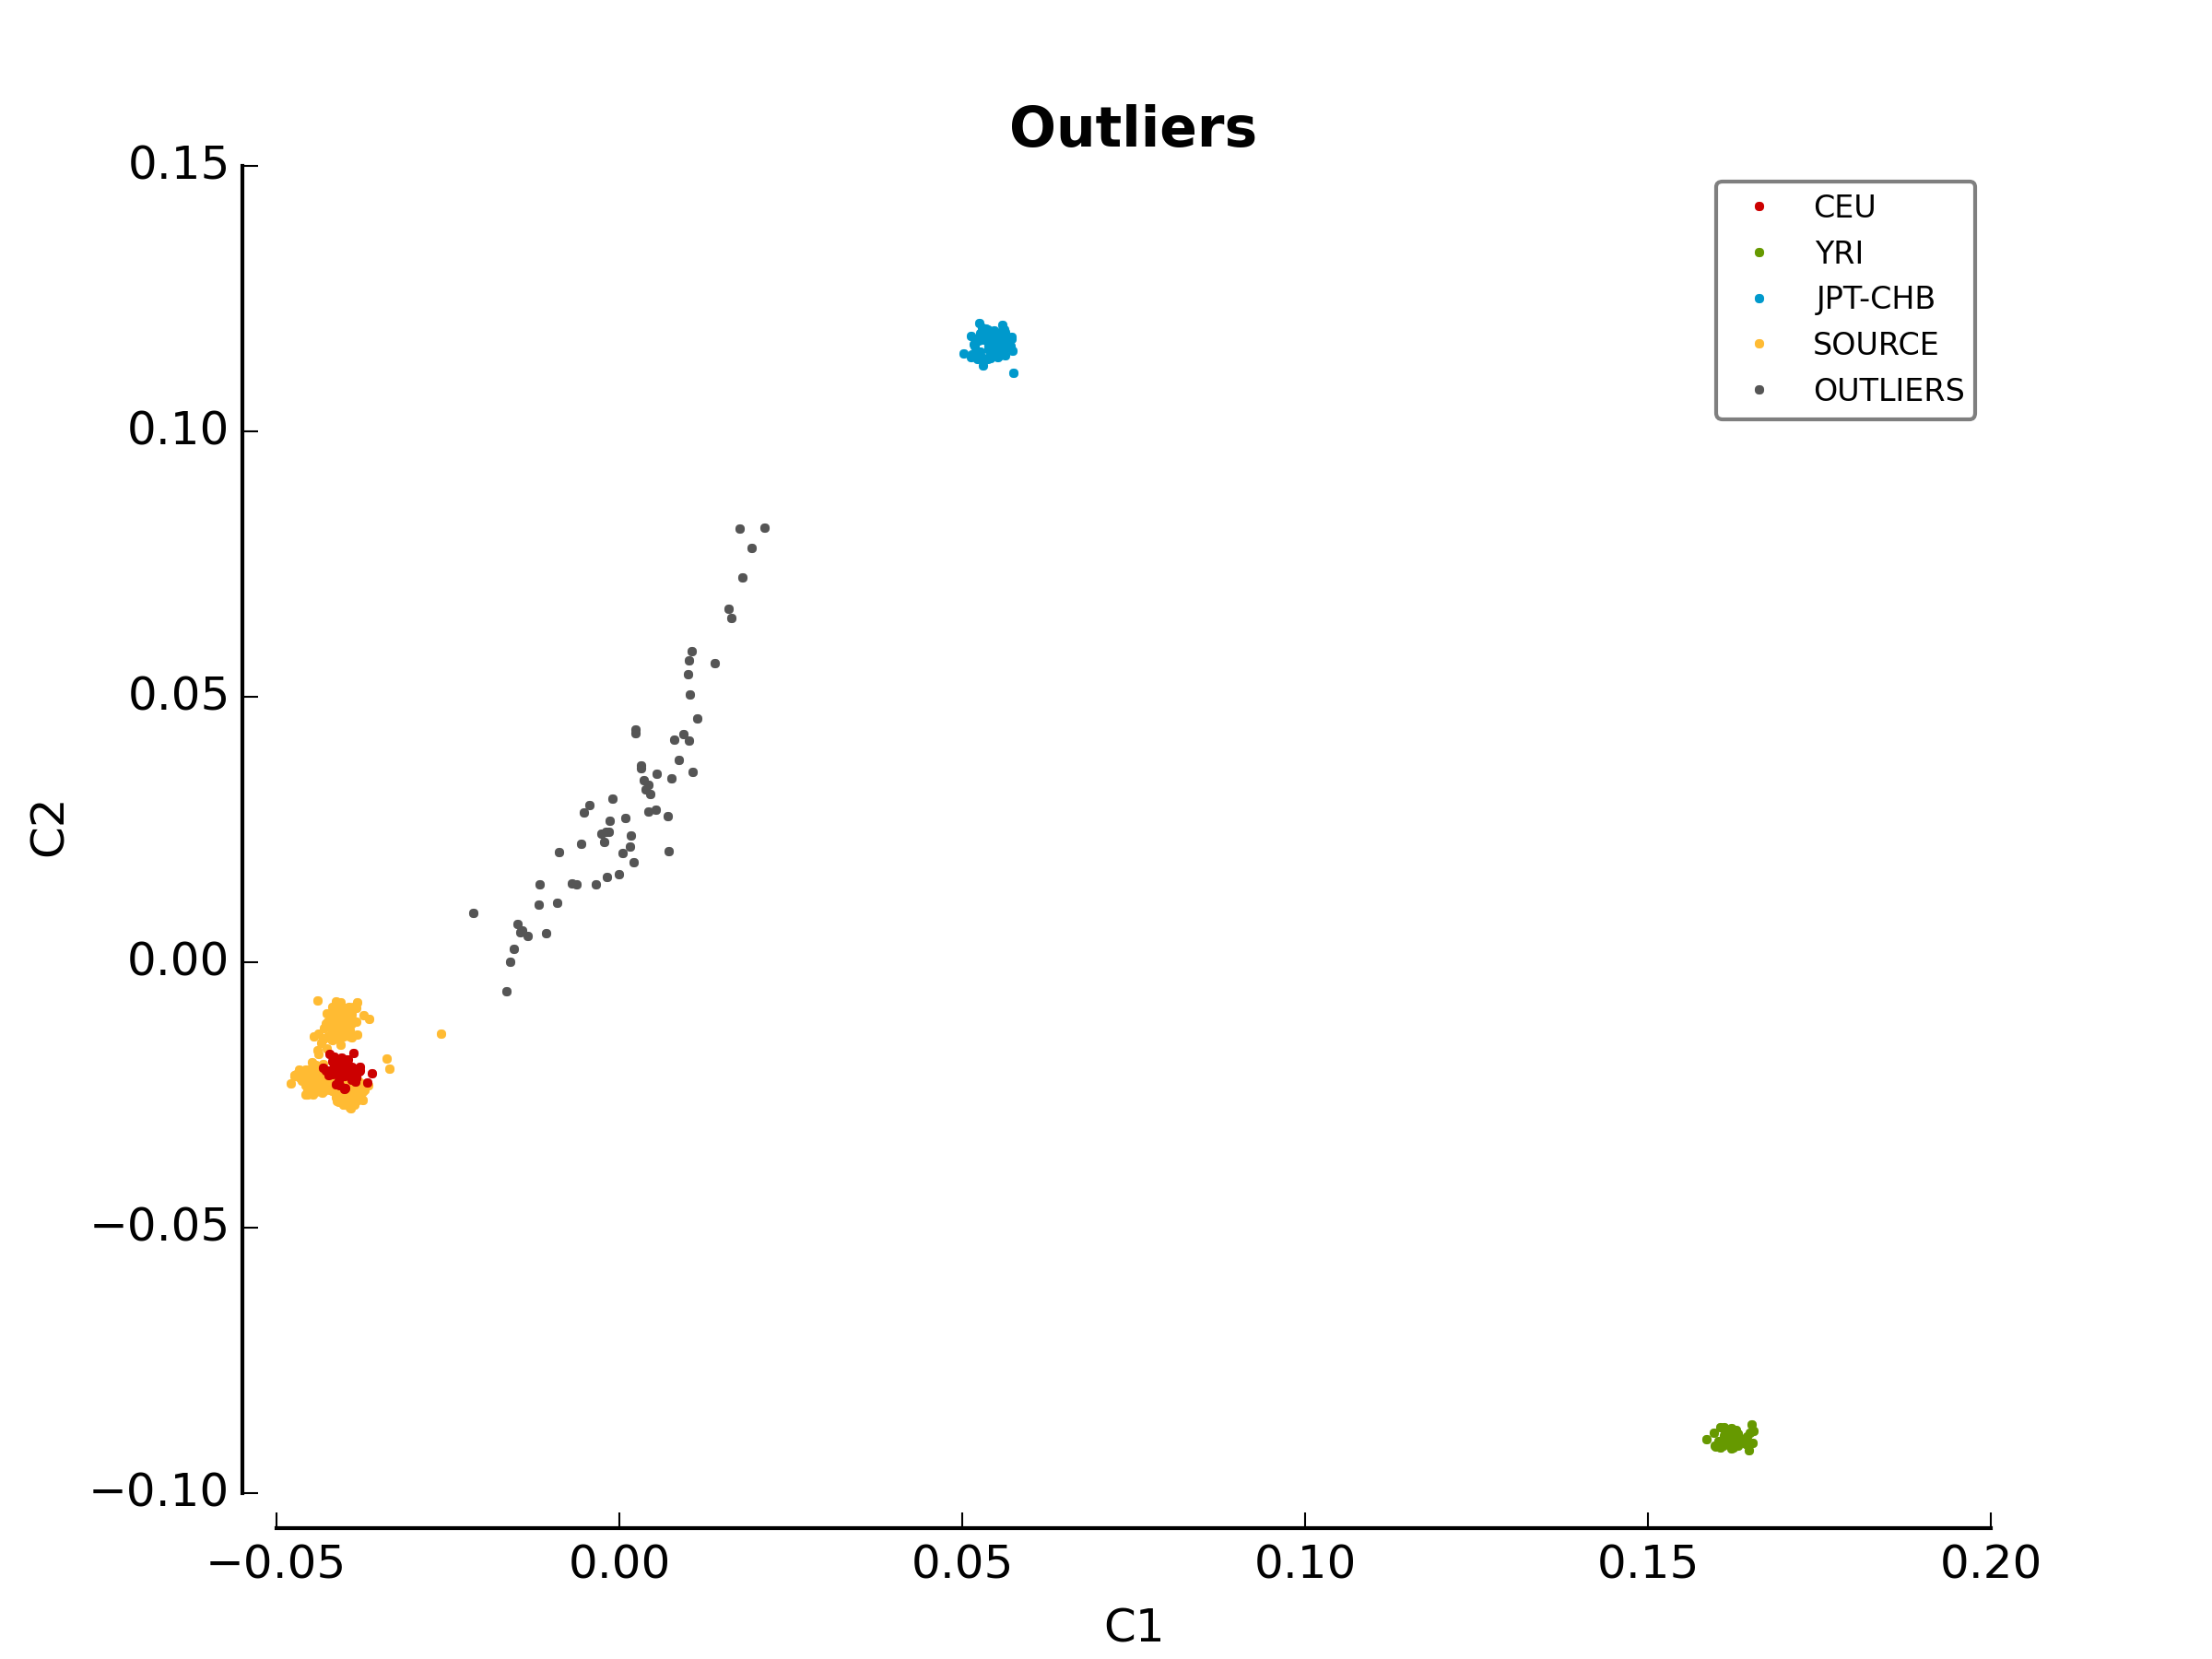
ethnicity.outliers.png
2_sex_check/
In the second directory, there should be a file containing the list of samples with gender problem. There should be exactly 4 samples with gender problem. For more information about this module, refer to Section Sex Check Module.
If you want to compare your results with the expected ones, just download the
files in the archive pyGenClean_expected_results.tar.bz2, available through
http://statgen.org/downloads/pygenclean/. They were generated using Fedora
18 (64 bits) in about 20 minutes. You should at least compare the following
files:
1_check_ethnicityethnicity.outliersethnicity.population_file_outliers- All the figures (they might be mirrored).
2_sex_checksexcheck.list_problem_sexsexcheck.list_problem_sex_ids
Automatic report
If LaTeX is installed, you can perform the following commands to compile the automatic report into a PDF file.
$ pdflatex automatic_report.tex
$ pdflatex automatic_report.tex
$ pdflatex automatic_report.tex
The following PDF report will be generated.